Webflow

How to add a Dropchat bot to your Webflow site
Embedding a Dropchat bot on your Webflow site to create the perfect AI assistant.
  • First, log into your Dropchat account.
  • Click into any of the chatbots you have made previously. If you have not made a chatbot before, check out this guide. In this example, we will use a chatbot we already made from a PDF of the Bitcoin white paper.

After clicking into your chatbot, navigate to the “Manage Chatbot” tab towards the top left.

  • In the middle section, under “Share Chatbot”, click the blue “Embed” button.

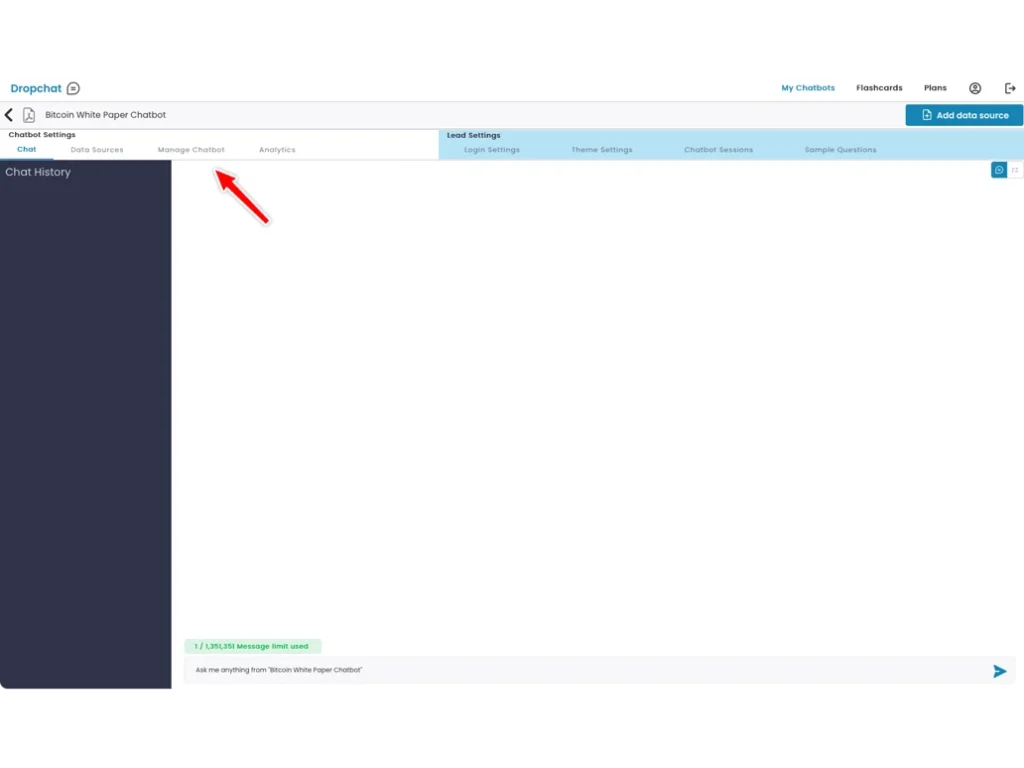
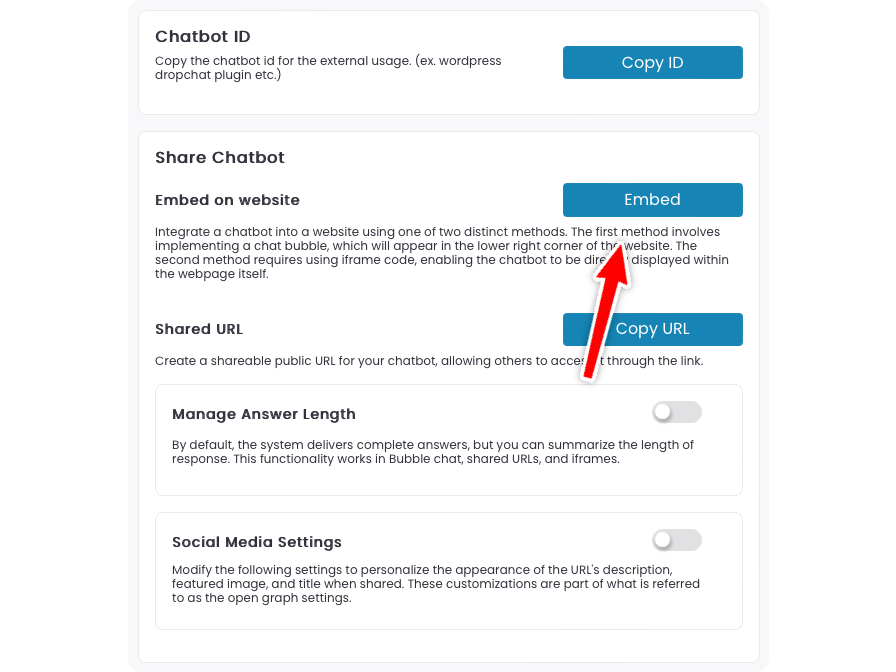
A pop-up will appear with options on how to add a Dropchat to your site. In this example, we will be creating a chat bubble in the bottom right of your site, which is the most user-friendly option for most websites.

  • Click the “Copy Code” icon on the top code snippet option.

Now that you have this code snippet copy-pasted, we can go to Webflow.

In Webflow, there are two ways in which you can embed embed Dropchat on your site.

  •  Across your entire site (globally)
  • On individual pages only

To add Dropchat across your entire Webflow site:

  • Visit Site settings > Custom code tab
  • Add your custom code in the Head code section
  • Click Save changes

To add Dropchat to individual Webflow site pages:

  • Open your site in the Designer
  • Open Page settings for the page where you’d like to add your code
  • Add your custom code to the Inside <head> tag section under Custom code 
  • Save your changes

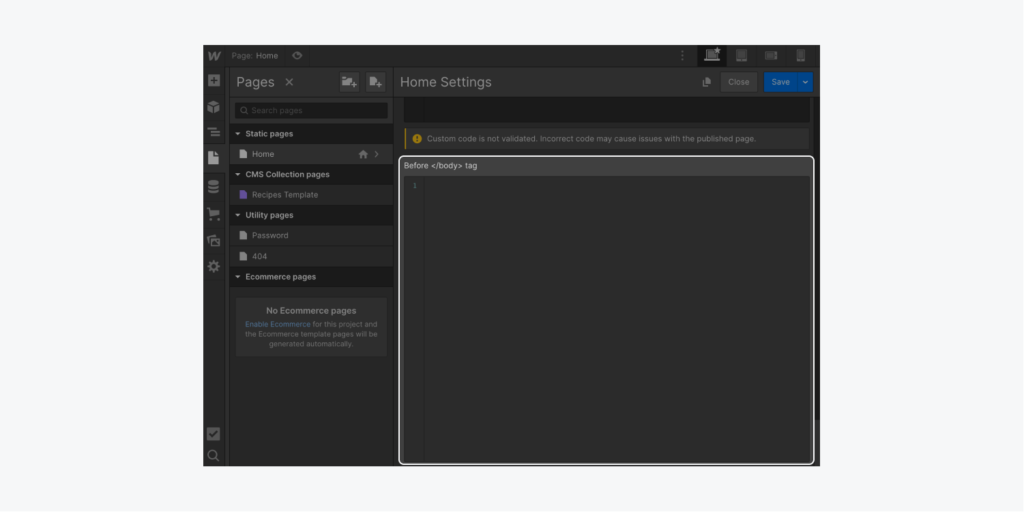
Good to know: Adding external <script> tags to the <head> of your site can slow page loads. Consider adding the “async” or “defer” attribute in the <script> tag to improve performance. Alternatively,  you can your custom code to the Before </body> tag section under Custom code if you find the Dropchat script is impacting your site performance.

To add custom code before the closing </body> tag of an individual page: 

  • Open your site in the Designer
  • Open Page settings for the page where you’d like to add your code
  • Add your custom code to the Before </body> tag section under Custom code
  • Save your changes

If you need further guidance on how to adding your custom code snippet to Webflow, check out this in-depth guide from Webflow University.